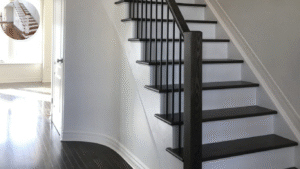
Staining your stairs to match the floor is one of the most effective ways to create a seamless, cohesive look throughout your home. By carefully selecting a stain that complements your existing flooring and applying it with attention to detail, you can unify your space and elevate its overall aesthetic-without the need for a costly remodel. This process involves choosing the right color and finish, preparing the stairs properly, and applying the stain for a professional, polished result. With the right approach, your stairs can blend beautifully with your floors, making every transition between levels feel intentional and harmonious.
Different types of stains and their properties
Stains come in various types, and each has unique properties that can enhance your stairs. Water-based stains are popular for their quick drying time and easy cleanup. They penetrate wood well while maintaining a lower odor.
The oil-based stains offer rich color and depth, but they take longer to dry.
Gel stains are thicker and sit on the surface, making them great for uneven woods or surfaces that need extra attention. These allow more control during application, resulting in an even finish.
Consider the finish as well; matte options give a natural look, while satin or gloss finishes add shine and protection against wear. Understanding these differences helps you make informed choices when staining your stairs to match your floor perfectly.
Choosing the right stain color to match your floor
For seamless design, choosing the right stain color is crucial. It’s essential to consider your existing flooring. Look at the undertones of your floor—are they warm or cool? This will guide you toward complementary colors.
Take samples of different stains and apply them in small areas on your stairs. Observe how each one interacts with the light throughout the day; this can dramatically change its appearance.
Also, think about durability and maintenance when choosing a stain. Darker colors may hide scuffs better but might require more upkeep over time. Lighter shades can brighten spaces, but they often show wear more quickly.
Consider testing combinations as well. A two-tone approach could also create depth and interest while tying in both elements beautifully. Remember, it’s not just about matching; it’s about creating harmony between all surfaces in your home.
You may also read(at night why does my house get hot)
Preparing the stairs for staining
Before you begin staining your stairs, preparation is key to achieving a flawless finish. Remove any furniture or obstacles from the area. This creates a safe space for you to work.
Next, inspect the stairs for any damage. Repairing scratches or dents will ensure an even stain application. Sand down rough patches using sandpaper, making sure to follow the grain of the wood for best results.
Once sanded, thoroughly clean the surface with a vacuum and damp cloth. Dust can settle on freshly stained wood and ruin your efforts.
If your stairs are previously finished, removing old finishes completely may be necessary. Apply a chemical stripper if needed; just follow safety guidelines carefully.
Let everything dry completely before moving on to staining. Proper prep sets the stage for beautiful results that truly enhance your home’s aesthetic.
Step-by-step guide on how to stain your stairs
Start by gathering your materials. You’ll need a high-quality stain, brushes or rollers, painter’s tape, and rags for cleanup.
Begin with proper preparation. Clean the stairs thoroughly to remove dust and debris. If needed, sand any rough spots to ensure an even application.
Next, apply painter’s tape along the edges where the stairs meet walls or other surfaces. This will help create clean lines.
Pour your stain into a tray. Use a brush or roller to apply it evenly on one step at a time. Be sure to follow the wood grain for better absorption and appearance.
Let each coat dry according to the manufacturer’s instructions before applying additional layers if necessary. Typically two coats yield optimal results.
Once satisfied with coverage and color depth, allow everything to cure fully before using your stairs again—patience pays off!
Tips for achieving a professional finish
To achieve a professional finish when staining your stairs, preparation is key. Start by ensuring that the surfaces are clean and free from dust or debris. Stains can be more readily absorbed on a well-prepped surface.
Use high-quality brushes or foam applicators to apply the stain evenly. This helps avoid streaks and ensures uniform coverage across each step. Maintain control over the application process by working in manageable sections..
Consider using a wood conditioner beforehand if you’re working with softwoods like pine. It promotes even staining and reduces blotchiness.
After applying the stain, allow it to dry thoroughly before adding a protective topcoat. Choose a durable finish such as polyurethane for enhanced durability against wear and tear.
Be patient during this entire process; rushing can lead to mistakes. Take your time for the best possible outcome, reflecting quality craftsmanship throughout your home.
Maintenance and upkeep of stained stairs
Maintaining stained stairs is essential for keeping them looking their best. Regular upkeep can prevent wear and tear, ensuring that your hard work pays off.
Start by sweeping or vacuuming the stairs frequently to remove dirt and debris. This will help prevent scratches on the stain’s surface. For deeper cleaning, use a damp mop with a mild cleaner specifically designed for wood surfaces. Avoid harsh chemicals that could strip away the finish.
Every few months, assess the condition of your stained stairs. Look for signs of fading or damage. If needed, consider applying a fresh coat of stain to revive their appearance, matching it closely with your floor color once again.
Using felt pads under any furniture near the stairs also helps reduce potential scratches.
By consistently caring for your stained stairs and addressing any issues promptly, you’ll maintain their beauty while ensuring they continue to complement your flooring beautifully over time.
You may also read(how do i choose the best floor scrubber for home use)
