
Wood slat acoustic panels for the ceiling at home are a simple way to make a room feel quieter, warmer, and more stylish. They combine decorative wooden slats with sound-absorbing backing, so they do more than look good. They also help control echo and reduce noise.
More homeowners are choosing this ceiling solution because it gives a room a clean, modern look without feeling cold or plain. If you have a living room that sounds hollow, a home office with too much echo, or a media room that needs better sound, these panels can make a big difference.
What Are Wood Slat Acoustic Panels?
Understanding Acoustic Panel Construction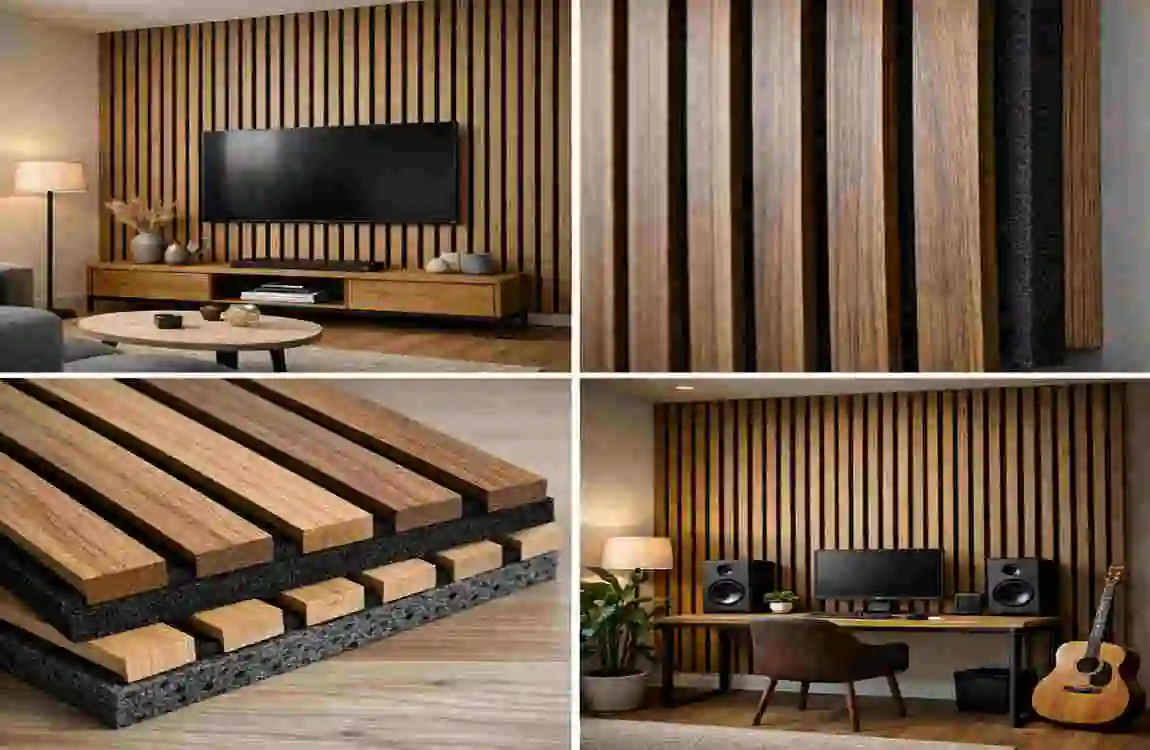
Wood slat acoustic panels usually have three main parts: wooden slats on the front, a felt or sound-absorbing backing, and a solid base that holds everything together. The slats give the panel its design, while the backing helps trap sound.
How Acoustic Ceiling Panels Work
These panels work by absorbing sound waves instead of letting them bounce around the room. That means less echo, clearer speech, and a more comfortable space overall. They do not make a room completely soundproof, but they can significantly improve the acoustics.
Common Applications in Homes
You can use them in many spaces, such as:
- Living rooms
- Home theaters
- Bedrooms
- Home offices
- Open-plan areas
Benefits of Wood Slat Acoustic Panels for Ceiling at Home
Enhanced Sound Quality
One of the biggest benefits is better sound. If your room feels loud or empty, these panels help reduce reverberation. That makes conversations easier to hear and media sound cleaner.
Modern Interior Design Appeal
These panels also add a natural, high-end look. The wood finish brings warmth into the room, while the slats create a neat architectural style.
Increased Property Value
A well-designed ceiling can make your home feel more Premium. Buyers often notice details like this, especially when they improve both style and comfort.
Easy Maintenance
Most panels need very little care. A light dusting or gentle wipe is usually enough to keep them looking fresh.
Eco-Friendly Options
Many products now use sustainable wood and recycled backing materials, which is a nice bonus if you want a greener home upgrade.
Tools and Materials Needed for Installation
Essential Tools
You will usually need:
- Tape measure
- Drill
- Stud finder
- Level
- Pencil
- Circular saw
Required Materials
Make sure you have:
- Wood slat acoustic panels
- Mounting screws
- Construction adhesive
- Ceiling battens, if needed
Safety Equipment
Do not skip safety gear. Use:
- Safety glasses
- Gloves
- Ladder
- Dust mask
Planning Your Ceiling Panel Installation
Measure Your Ceiling Area
Start by measuring the full ceiling space. This helps you calculate how many panels you need and reduces waste.
Choose the Right Panel Style
Think about the look you want. Oak, walnut, and black slats are popular choices. Some brands also offer custom finishes.
Decide on Panel Layout
You can cover the whole ceiling or create a feature area. A full-room layout feels bold, while a partial design can be more subtle.
Locate Ceiling Joists
Use a stud finder to locate joists before you install anything. This gives you a secure base and helps prevent loose panels later.
Preparing the Ceiling Before Installation
Inspect Existing Ceiling Conditions
Check the ceiling surface first. Look for cracks, soft spots, or moisture damage. Fix any issues before moving forward.
Clean the Surface
Dust and dirt can interfere with adhesion. Wipe the ceiling clean so the panels bond properly.
Mark Installation Guidelines
Use a pencil and level to draw straight reference lines. This keeps the panels aligned and makes the final result look professional.
Step-by-Step Guide to Installing Wood Slat Acoustic Panels
Gather and Organize Materials
Lay out all your tools and panels before you begin. It saves time and makes the process smoother.
Mark Ceiling Layout
Use your measurements to mark where each panel will go. Double-check the lines before you attach anything.
Install Support Battens, If Needed
Battens can create a small service gap and help level uneven areas. They also make mounting easier in some rooms.
Cut Panels to Size
Measure carefully before cutting. A clean cut helps the panels fit neatly and reduces visible gaps.
Apply Adhesive or Fasteners
Some panels can be installed with adhesive, while others need screws. Follow the product instructions and use the method that gives the best support.
Mount the First Panel
Start with the first panel in the most visible area. If this one is straight, the rest of the ceiling becomes much easier.
Install Remaining Panels
Continue across the ceiling and keep spacing even. Small alignment mistakes become more noticeable as the project grows.
Finish Edges and Corners
Trim the edges carefully so the ceiling looks complete. Good finishing makes the whole job feel polished.
Common Installation Mistakes to Avoid
Incorrect Measurements
A small measurement error can cause big fitting problems. Always measure twice before cutting.
Poor Ceiling Preparation
If the surface is dusty or damaged, the panels may not hold well.
Misaligned Panels
Even slight crookedness can stand out on a ceiling, so use your level often.
Insufficient Fastening
Do not rely on weak support. Make sure the panels are attached firmly.
Ignoring Manufacturer Instructions
Each product is a little different. Follow the instructions that come with your panels.
Design Ideas for Wood Slat Acoustic Ceilings
Modern Living Room Ceilings
A slatted ceiling can make a living room feel sleek and calm. It works especially well with neutral walls and soft lighting.
Luxury Home Theater Designs
If you want a cinema-style room, these panels are a strong choice. They improve sound while giving the space a rich look.
Home Office Soundproofing Solutions
In a home office, better acoustics can help you focus and sound clearer during calls.
Kitchen and Dining Area Applications
These panels can soften hard surfaces in open kitchens and dining rooms, which often feel noisy.
Accent Ceiling Concepts
You do not have to cover the whole ceiling. Even one section can create a strong design feature.
How Much Does It Cost to install Wood Slat Acoustic Panels?
Material Costs
Panel prices vary based on finish, size, and quality. Premium wood and better acoustic backing usually cost more.
Professional Installation Costs
If you hire help, Labor will add to the budget. This can be a smart option for large or complex ceilings.
DIY Installation Savings
Doing it yourself can save money, especially if the ceiling is simple and you already own some tools.
Factors Affecting Total Price
These details can change the final cost:
Expense Category Typical Cost Range
Acoustic Panels $8–$25 per sq. ft.
Adhesives & Hardware $50–$200
Professional Labor $5–$15 per sq. ft.
Total DIY Project Lower overall cost
Maintenance and Care Tips
Regular Cleaning Methods
Dust the panels with a soft cloth or use a vacuum with a brush attachment.
Preventing Moisture Damage
Keep them away from excess humidity unless the product is designed for wet areas.
Repairing Minor Damage
Small marks or loose edges should be fixed early so they do not get worse.
Long-Term Maintenance Practices
Check the ceiling periodically and tighten any loose parts as needed.
Are Wood Slat Acoustic Ceiling Panels Worth It?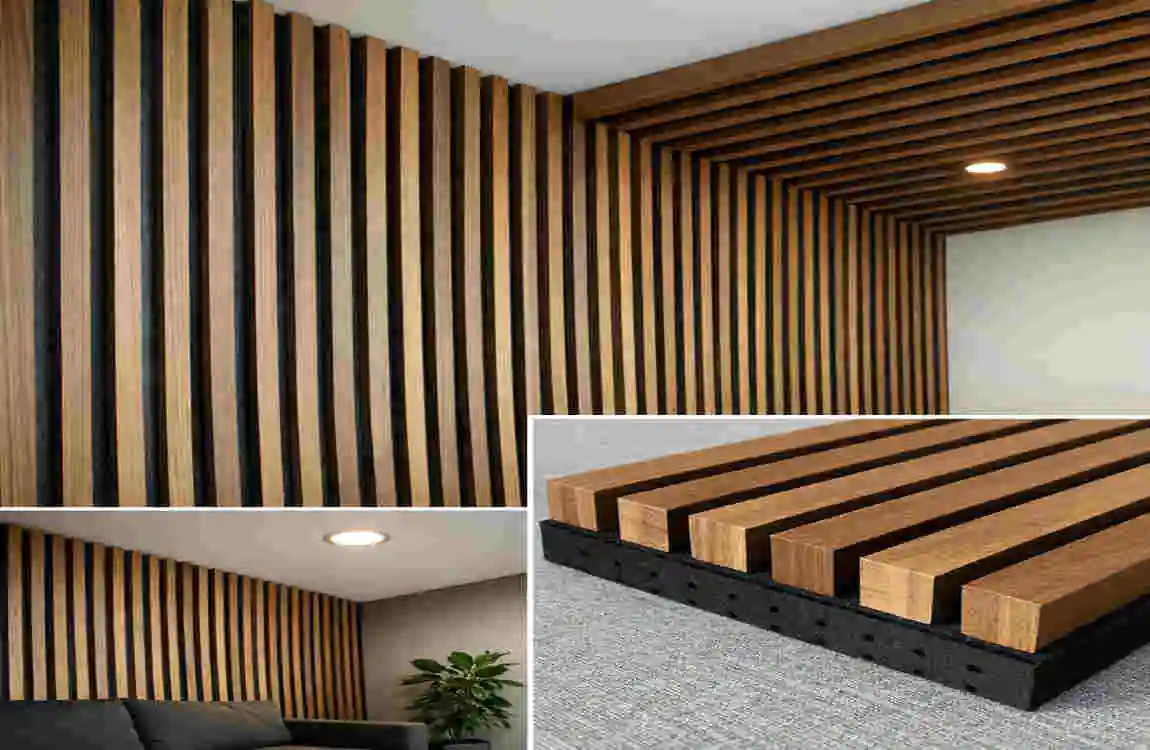
Advantages
They offer better acoustics, a modern look, and more comfort in everyday living.
Potential Drawbacks
The main downsides are the upfront cost and the time needed for installation.
Best Situations for Installation
They work best in large rooms, home theaters, home offices, and other spaces where noise control matters.
FAQ
How do wood slat acoustic panels reduce noise?
They absorb sound waves and reduce echo, which helps make the room quieter and more comfortable.
Can I install wood slat acoustic panels directly on drywall ceilings?
Yes, many panels can go directly onto drywall with screws or construction adhesive.
Are wood slat acoustic panels suitable for bathrooms?
Only use moisture-resistant panels made for humid spaces.
How long does installation take?
Most DIY projects can be finished in a weekend, depending on the room size.
Do acoustic ceiling panels increase home value?
They can, especially because they improve both style and function.
What is the best room for installing acoustic ceiling panels?
Home theaters, living rooms, home offices, and open-plan areas usually benefit the most.
| Step | What to Do | Key Tips |
|---|---|---|
| Measure the Ceiling | Measure the ceiling area where the panels will be installed. | Add 5–10% extra material for cuts and waste. |
| Gather Tools | Collect a drill, screws, level, tape measure, saw, adhesive, and safety gear. | Use a stud finder to locate ceiling joists. |
| Prepare the Surface | Clean the ceiling and remove dust or loose paint. | A smooth, dry surface improves adhesion. |
| Mark Layout Lines | Use a level and pencil to mark panel placement. | Start from the center for a balanced appearance. |
| Cut Panels to Size | Trim panels as needed using a fine-tooth saw. | Measure twice before cutting. |
| Apply Adhesive (Optional) | Add construction adhesive to the back of each panel. | Use adhesive recommended by the manufacturer. |
| Secure Panels | Screw panels directly into ceiling joists or battens. | Ensure panels are firmly attached and aligned. |
| Check Alignment | Verify that each panel is level and evenly spaced. | Make adjustments before tightening all screws. |
| Finish Edges | Install trim pieces or edge panels for a clean look. | Matching trim creates a professional finish. |
| Final Inspection | Check for gaps, loose screws, or uneven sections. | Clean the panels and remove installation debris. |